Thursday, February 14, 2013

Boorak

I have no idea if this is how you spell "boorak", but they are so delicious it doesn't even matter.  They are like Assyrian egg rolls made with ground beef, parsley, onions, and the perfect amount of spice.  My mother takes control of making the "gheema" (ground beef filling), I do the rolling, she does the frying, I do the eating. Perfect assembly line!

You start by preparing the gheema (another word I have no clue how to spell)

Browning the meat


Onions are cooking...


Adding the greens...
 
 
While the gheema cools a little bit, get out the egg roll wrappers
 
 
...and get your work station ready!
(The bowl on the right is filled with water)

 
Let the rolling begin!
 
Start by adding the meat.  I usually use about 2 tablespoons.. sometimes more.
Make sure you line the top half edges with some water before folding the sides in and rolling it up so it doesn't fall apart.


Those rolling skills are years in the making.

 
My aunt Evelyn's specialty.. giving it a couple chapooleh so it's flattened out. :-)

 
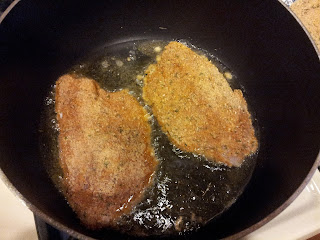
Waiting for the Queen to start frying.
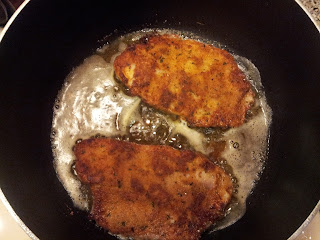
 
Sizzzzzle time!


YUMMMMY

 
They are delicious and addicting.  Perfect for an appetizer, meal, snack, whatever.  They are even great leftover if you pop them in the oven for a few minutes!
 
 
We used 4 lbs. of beef because we cook in bulk.  You could easily use 1, 2, 3, ...whatever you are trying to make.
 
Boorak

Ingredients:
4 lbs ground beef
3 large onions, diced ( we used about 6/7 really small onions)
1.5 tbsp salt (to taste)
2.5 tbsp pepper (to taste)
1/2 tsp. hot red pepper
1.5 bunches parsley leaves, chopped
3 packages egg roll wrappers
Oil

Directions:
1. Cook ground beef on high until brown. Break it up into tiny pieces.
2. When the beef is brown, add the onions, salt, pepper, and hot red pepper.
3. When the onions are fully cooked, turn the stove off. Add the chopped parsley. Mix it around.
4. As the beef starts to cool, get out the egg roll wrappers and pour some water in a bowl.
5. Using about 2 heaping tablespoons of the ground beef, roll up a boorak like an egg roll. Use the water to help the wrapper stick together.
6. Heat some oil in a large pot. Fry them up until they are golden.
7. ENJOY!!


Monday, January 28, 2013

Broccoli

Broccoli... who would ever think that someone would write a whole post on boring old broccoli.  THIS girl because this is the BEST broccoli ever.  I used to like broccoli, now I love it.  Between my bro and sis, the broccoli battle can quickly turn into a brawl.  I would just give up and go back to the garlic mashed potatoes.

It doesn't get much simpler than this.  My mom couldn't even believe I had to write it down.  Unfortunately, my brain isn't a filing cabinet full of delicious recipes like hers is.

If you like broccoli, try this.  If you don't like broccoli, try this.  It may change your feeling on the little trees.


So throw it all in a pan and cook it until the broccoli is cooked to perfection.


But not without the secret ingredient! Vegeta seasoning.  I don't even know what's in here but it takes your broccoli to a whole new level.


And back to the same dinner plate of perfection.


Broccoli

Ingredients:

2 lbs broccoli florets
Olive oil

Pepper
1/2 tsp. vegeta seasoning


Directions:
1. Rinse and drain broccoli.
2. Put all of the ingredients in a large pan.  Cook on high until broccoli is tender.
3. Squeeze some lemon over it and ENJOY!!

Garlic Mashed Potatoes

I LOVE POTATOES! Who doesn't.... fried, baked, mashed... however they are made they are delicious (with the right amount of salt of course!). My personal favorite is my momma's garlic mashed potatoes.  They are too good to be true.  They are inspired by The Cheesecake Factory, but they might even be a littttttttle bit better.

 The secret ingredient: red potatoes with a little bit of skin.  Mashed potatoes are sooo much better when you use red potatoes.  No clue why, just trust Chef Hively.

Peel.


Boil.


Mash.

Forgot to take a picture..... Too busy mashing.

EAT!


Garlic Mashed Potatoes

Ingredients:

5 lb. red potatoes, peeled with some skin still on
1 tsp. salt
1/2 cup milk
1 stick butter
Garlic and herb seasoning
Pepper


Directions:
1. After peeling and rinsing the potatoes, put them in a large pot and cover them with cold water.  Add a teaspoon of salt.  Put on high with the cover halfway on.  Cook for about 1 hour or until the potatoes are tender.
2. When the potatoes are fully cooked and soft, drain the water.  Mash the potatoes and add the milk, butter, garlic and herb seasoning and pepper to taste.
3. ENJOY!!

Spicy Fried Tilapia

We eat everything in this house- including seafood.  So when I saw my momma came home from the grocery store with a bag full of tilapia, I knew there would be a new blog post in the works.  I love this tilapia recipe because it's a little crunchy from being fried, a little spicy, and the perfect amount of flavor.

So first you need to get your "dipping stations" organized.  
Start off with some bread crumbs, salt, pepper, and of course some HOT red pepper to give it that extra kick.


Eggs, Worcertershire sauce, Frank's Red Hot... just in case it needs a little extra spiciness


Whip it up!


Our fancy dipping station.


And now the fun part- START FRYING!


 They cook super fast.


 Catch 'em while they're hot!


Spicy Fried Tilapia
Ingredients:

About 3 lb. of tilapia, rinsed under cold water
Italian style bread crumbs
Salt
Black pepper
1/2 tsp. Hot red pepper
2 eggs
2 tbsp. Franks's red hot sauce
2 tbsp. Worcestershire sauce
Flour
Vegetable oil
Directions:
1.  In a large platter, mix a generous amount of bread crumbs, salt and pepper to taste, and hot red pepper.
2. In a separate bowl, mix 2 eggs, hot sauce, and Worcestershire sauce.
3. In a plate, pour a layer of flour.
4. Heat a large pot/pan with vegetable oil on high.
5. Rinse the fish under cold water.  Dip the fish in the flour, then the egg mixture, and then the bread crumb mixture.  Put the fish directly in the pot.  Cook on each side for about 3 minutes until both sides are brown.
6. ENJOY!!

Greek Salad

Greek Salad: delicious & simple.  It is definitely one of those salads that looks a lot fancier than it actually is.  And it tastes sooo good.  I am not a fan of oregano AT ALL, but for some reason, it doesn't bother me in this salad.  I think it is the mix of all the yummy goodness together.

Start it off by chopping up all of your ingredients.

Had to get an action shot of her rapid slicing.  Look how quick those little cucumbers are flying!
 

Mixing it all up together.


Add the dressing.


 Add some olives for garnish and enjoy!


That was our attempt at being fancy.

This recipe is so simple it barely has directions.

Greek Salad

Ingredients:
6 cucumbers, peeled and sliced
6 Roma tomatoes, sliced
I medium red onion, sliced
About 1.5 lbs feta cheese, rinsed and cubed
Salt
Pepper
2 tablespoons oregano
1 cup olive oil

Directions:
1. In a large bowl, mix the cucumbers, tomatoes, onions, and feta cheese.
2. Add the olive oil oil, oregano, and salt and pepper to taste.
3. Mix it all up and ENJOY!!

Friday, January 25, 2013

Chicken Curry Shirwa

Rizza Shirwa is probably the most common Assyrian meal, with a million different combinations.  Shirwa is basically a stew that we eat over rice.  They are usually made with beef (but sometimes chicken) and include all different kinds of vegetables like green beans, eggplants, potatoes (not really a vegetable but whatever), etc.  One of our favorites is made with curry, but we pronounce is karr-ee, with the rolled r's of course.  It is definitely my bro's favorite.  He has a sick love affair with anything spicy- curry, jalapenos, gardinera.

It is spicy and scrumptious! My mom either makes it with beef or chicken.  I like it either way.


We start by cooking the chicken.


While that's cooking, it is time to prepare the potatoes.  Peel, cube, and rinse.  My mother doesn't use a peeler, which I just can't understand, so of course Speedy Gonzales peeled those potatoes in record time.  


Throw the potatoes, some water, and curry in.


I wasn't joking when I said it was spicy!


We had some mushrooms in the fridge so we put them in there, too.  It is not typical to put mushrooms in there.  But I LOVE mushrooms so it adds a nice touch.


And there you have it! Some spicy shirwa for the daring bunch.


Pour it over some rice and you won't be disappointed!


Chicken Curry Shirwa

Ingredients:
About 2-2 1/2 lbs. of chicken thighs and breasts
1/4 cup vegetable oil
Salt
Black pepper
3 medium sized onions, julienne cut
3 cloves garlic, chopped very tiny
4-5 potatoes, peeled and cubed (you can add more or less depending on your preference-or leave them out altogether)
2 tablespoons hot curry
8 oz. tomato sauce
Mushrooms, sliced (optional)
1/2 cup water

Directions:
1. Cut up chicken and rinse it.  Cook on high in a large pot with oil, onions, garlic, salt, and pepper.  Once the chicken is not pink anymore, cover the pot and turn it on medium.
2. Peel and cube the potatoes.  Add the potatoes, 1/2 cup water, and curry to the chicken pot. Cook on medium/high.  Add the mushrooms if you would like.
3. Once the potatoes are tender, add 8 oz tomato sauce (you can put some water in there to make sure you clean out all of the tomato sauce) and mushrooms.
4. Leave on medium so everything has a chance to soak in the flavor and cook to perfection.
5. Enjoy over some hot, steaming rice!


Rizza...for Dummies

If you know Assyrians, you know they LOVE rizza (rice).  It goes with everything- shirwa, chicken, salad (which deserves it's own post), or even by itself when it is soft, steamy, and buttery.  There are also tons of dishes that include rice as a main ingredient.  But before I get adventurous and start whipping up some beryani, I need to learn how to make some rice!

The first time I tried to make rice on my own was Sophomore year of college (my first and ONLY time).  My mom always tells me "It's the easiest thing! 1, 2, 3!"  So I didn't think it could be that challenging to make some rice..... WRONG!  I think my first mistake was I didn't buy basmati rice.  I can't even remember what I bought because I try to block that memory out of my life.  I over cooked, over stirred, over analyzed the simple rice.  Basically, I ended up burning the rice so bad that the bottom of the pot had an inch of burnt rice on it- completely black.  Instead of dealing with the nightmare, I threw the pot away and pretended it never happened.

So now that I am back home, it is time to start observing and learning!

First of all, like I mentioned before, you gotta start with some basmati rice.


We used 3 cups, which is enough to feed our family of 5 and then some.  We always have leftovers in this house!

To start, we have to rinse the rinse about 5 of 6 times. My mom explained something about starch.... I don't know I just listen to the chief. 


Add some salt.... 
Once again, we never measure.


Time for some butter! Typically, you add 2 tablespoons of butter for each cup of rice, but we like it extra buttery so we made it 1 stick.

mmmmmmmm.... butter....
No one likes butter like my little sister Melanie... who used to dip her skinny little fingers in the stick of butter and eat it like candy.  Barf.


Halfway cover that baby and let the butta start melting.


As the butter starts melting, and looks like this, it is time for a stir.

Pre stir:


Post stir:


Once all of the liquid is absorbed, it is time for the final stir!

Look at that steeeeaaaam!


ALLLAHHH! And there you have it people!  Perfect, buttery, yummy, tasty rizza.  Throw soime shirwa on there and you have a delicious meal.


Now the real challenge will be me cooking it all by myself- without having to throw a pot away!


Rizza

Ingredients:
3 cups rice
6 tablespoons butter ... Or 1 stick if you like it extra tasty :-)
3 cups water
Some salt

**The rule of thumb is 2 tablespoons butter for each cup of rice.  Cups of water are always equal to the cups of rice.**

Directions:
1. Pour 3 cups of rice into a large pot.  Rinse the rice about 5-6 times until the water is clear.
2.  Add three cups of water, some salt, and a stick of butter to the rice.  Put it on high with the lid halfway on.
3.  Give the rice a stir when the butter is halfway melted (after about 5/6 minutes).  Put the lid back on.
4. Once all of the liquid is absorbed, put it on low and give it a stir.  Cover the pot and put a diffuser underneath the pot.  Leave on low for about 45 minutes.
5. Give the rice one last stir.
6. ENJOY!!


Wednesday, January 23, 2013

Cream of Chicken and Rice Soup

After being inspired by my cousin Jacqueline's amazing blog (go check it out!), and my mother's gourmet cooking, I have finally decided to start keeping track of all of my family's fantastic recipes. If there is one thing we all bond over, it is definitely our love of food! 

In order to survive Chicago's freezing cold winter, my momma makes sure to fill us up with some hot, thick, and creamy soup.  Our family favorite by far is her Cream of Chicken and Rice Soup.  Like everything she makes, it is her own variation.  There are two things this woman doesn't do: follow recipes and measure. Luckily for her, her dishes always come out perfect.  However, anytime somebody asks for a recipe, it's a little bit of this and a handful of that. It is my mission to make her measure so we can finally have some recipes to follow.

Now, on to the good stuff!

To get started, you need to throw some Uncle Ben's original long grain rice in a pot with some water and chicken bullion.


And a pic of the Maggi chicken bullion:


In the next pot, you start by melting some butter.  Then add the carrots, celery, onion and chicken.


It's cooking!


Yes, my mom still cooks even at 8:55 p.m. 
Both pots are taking their sweet time.


After the chicken has had some time to cook, it is time to add the flour/water mixture.  It turns into a big, sticky, brownish ball.  I couldn't get any action shots of swirling it around because of my phone camera.


This is what happened when I tried to get an action shot.....


Pre- mixing


And finally the deliciousness is starting to come together.  We tried to be fancy like Jacqueline and show of some cooking shots....we still need some practice!


And of course, what would a "Cream of...." Soup be without the heavy whipping cream?!
It just makes everything taste better.


And there you have it.... delicious soup!


Our attempt at showing off.. :-)


This soup is amazing! Definitely worth trying.  My favorite part is that it's not super thick and creamy like some restaurants serve it.  Instead, it is more of a "light" creamy soup...whatever that means.

Now it's time to enjoy some soup on this cold, January day....BRRRR.


Cream of Chicken and Rice Soup

Ingredients:
1/2 cup Uncle Ben's original long grain rice
Between 3/4 lb to 1 lb boneless skinless chicken breast cubed into tiny pieces
8 cups water
2 cubes Maggi chicken flavored bullion
4 tbsp butter
2 stalks celery, chopped 
Handful of shredded carrots, chopped
Small onion, chopped
1/2 tsp pepper
1/2 cup flour mixed with 1/2 cup water
8 fl oz. heavy whipping cream

Directions:
1. Pour 1/2 cup of Uncle Ben's rice, 2 cubes of chicken bullion and 8 cups of water into a large pot-uncovered. Leave on high until it boils, and then turn down to medium.  Leave on medium until rice is fully cooked.
2. In the meantime, melt 4 tbsp butter in a separate pot. Add the chopped celery, shredded/chopped carrots, chopped onion, pepper, and cubed chicken and cook on high.  There is no need to add salt because the chicken bullion has enough salt.  Once the chicken is no longer pink, after about 5 minutes, put on medium and cover it.
3. After cooking on medium for about 40 minutes, add a mixture of 1/2 cup water and 1/2 cup flour to the chicken pot.  Cook on high for about 5 minutes while constantly stirring it.  It turns into a brownish ball.
4. The rice should be fully cooked by now.  Add the rice, including the broth, to the chicken mixture.  Cook on high for a few minutes until the chicken mixture melts.
5. Change the heat to medium.  Add the heavy whipping cream and slowly stir it in.  Cover the pot and let it cook for about 10 more minutes.
6. ENJOY!